Looking to create an Instagram carousel to showcase your photography? The easiest way I’ve found to do that is to create a carousel using Photoshop.
I’ve created the simplest step by step guide to creating an Instagram carousel in photoshop, so you can get on and do the important stuff, like actually creating a carousel.
Or download this file to skip the process of making it yourself.
Step 1. Open photoshop and create a new document.
We want to create an image that is as big as Instagram allows and be optimal for the platform.
Most commonly used IG dimensions (what I will use for this tutorial):
1080px width x 1350px height = 4x5 Vertical Aspect Ratio
On the right-hand side, we can put in the height and width of the carousel we would like to create.
As we want to create a 10-page carousel, we must multiply the width by 10.
Set your WIDTH to 10800px
Set your height to 1350px
Ensure your resolution is 300pixels per inch to be able to export files in their highest quality for Instagram.
Top Tip: Save and name the preset by clicking on this icon so you can access it quickly and easily in the future.
Step 2: Creating the template
You’ll see you’ve got a massive wide boy document, which needs to be chopped up into 10 consecutive pages. Here’s how we create each page for the Instagram carousel.
Click View
Click New Guide Layout
Ensure Columns are checked and ‘Gutter’ set to 0.
Set ‘Columns’ to 10
Hit ‘OK’
Click New Guide Layout
Columns selected and number set to 10
Boom, now we’ve got some lines on our page.
Click View
Click ‘Snap to’
Ensure the ‘Guides’ Option has a checkmark next to it
Step 3: Place your images where you want them.
Super simple, place the images where ever you want them on the Instagram Carousel and remember that your viewers will swipe from left to right.
Step 4: Creating 10 images from 1.
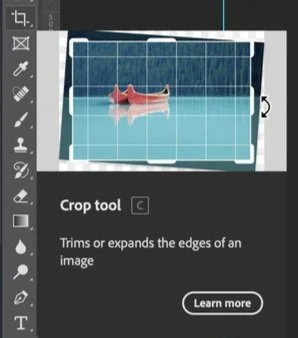
Click on the ‘crop’ tool on the left-hand side of the screen
Select Crop Tool and Right click
Right-click on ‘crop tool
Click slice from guides along the top bar
At the top, click ‘Slice From Guides’
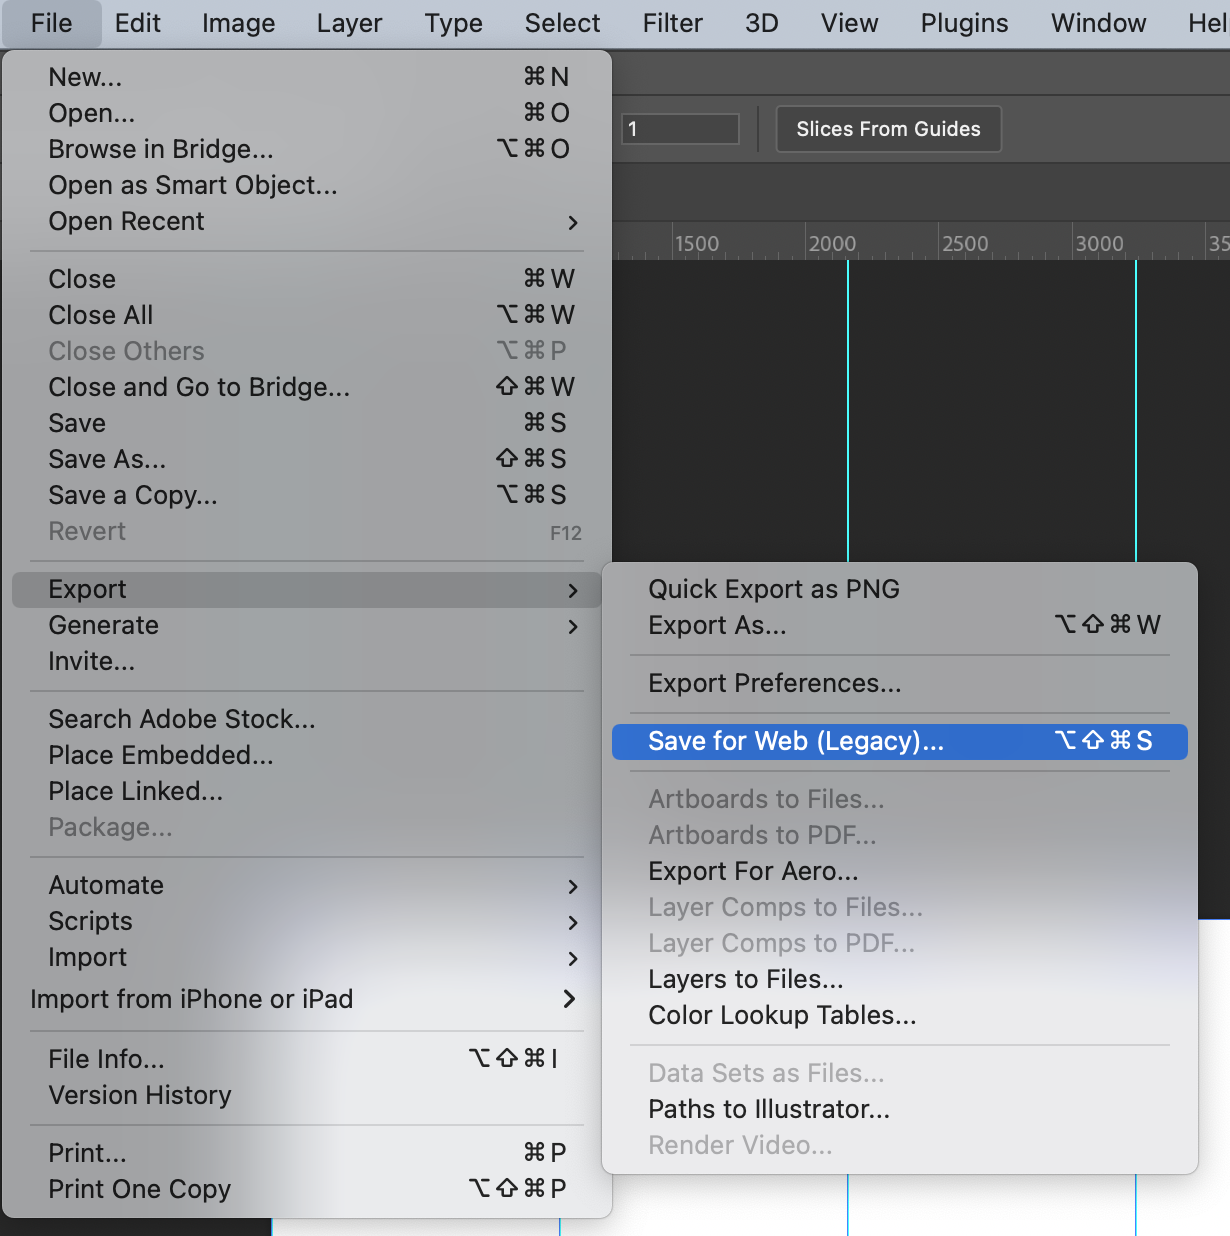
Click File on the top bar
Click Export
Click ‘Save To Web (Legacy)
On the right-hand side of this menu:
Click the drop-down and ensure quality is ‘Maximum’ and quality set to 100
When ready to export, click ‘Save.’
Ensure you put in where you want to save the files
Ensure 'Slices:’ option is set to ‘All Slices’
Click save again, and boom, you’ve got yourself an Instagram carousel.
Top Tip: save it as a PSD file so you can open this whenever you want


